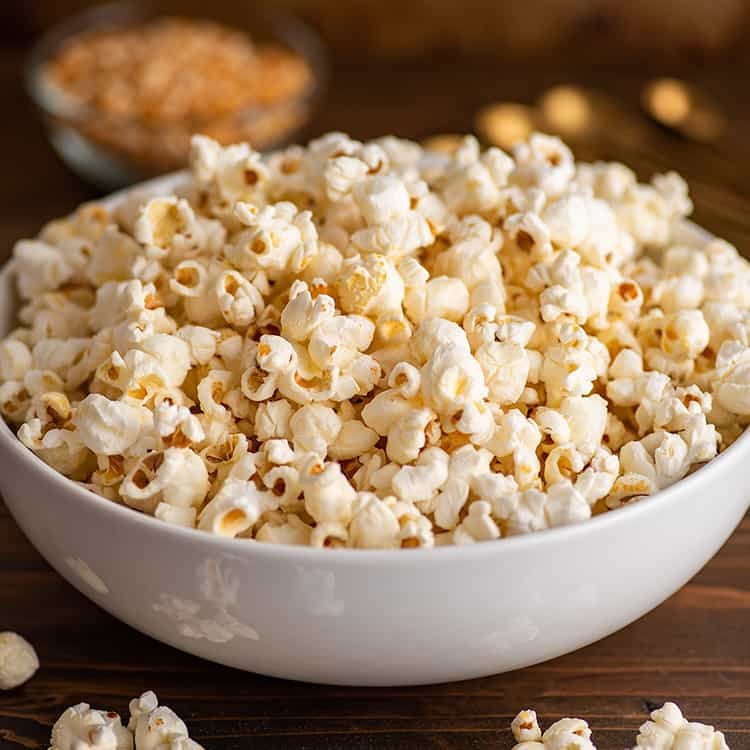
Perfect Kettle Corn Every Time: Key Tips for Crunchy Sweetness
There's a universally delightful scent that signals fun, festivity, and pure snacking bliss: the warm, sweet aroma of freshly popped kettle corn. For many, that distinctive fragrance immediately transports us to bustling county fairs, lively carnivals, or cozy movie nights. The unique appeal of kettle corn lies in its irresistible balance – a delicate dance between salty and sweet, with every kernel encased in a light, crisp, sugary coating that crunches just so, without sticking to your teeth like caramel corn.
While the enormous, steaming kettles at the fair might seem like the exclusive domain of this beloved treat, the truth is, you don't need a ticket to enjoy perfectly popped, fair-quality kettle corn. With just a handful of everyday ingredients, one trusty pot, and a few minutes of your time, you can replicate that magical experience right in your own kitchen. Forget stale grocery store bags or lackluster microwave versions; mastering your own kettle corn recipe at home guarantees unparalleled freshness, crunch, and flavor. Let's dive into the secrets of creating this addictive snack, ensuring perfect results every time.
What Exactly Is Kettle Corn?
Before we roll up our sleeves, let's clarify what makes kettle corn distinct. In the grand pantheon of popcorn, kettle corn occupies a coveted spot, nestled comfortably between its plain, unsweetened cousin and the more decadent, stick-to-your-teeth caramel corn. It’s characterized by a whisper-thin, lightly caramelized sugar crust that forms on each popped kernel, providing that signature sweet-salty combination. Unlike heavily coated caramel corn, kettle corn retains a light, airy quality, offering a delightful crunch without being overly rich or gooey. This subtle yet satisfying balance is what makes it so incredibly addictive and a staple snack for countless occasions.
Why Homemade Kettle Corn is a Game Changer
The allure of fresh, warm kettle corn is undeniable, but relying solely on seasonal fairs or pre-packaged options often leads to disappointment. Store-bought bags, even the "freshly popped" ones, often succumb to staleness by the time they reach your pantry. Microwave versions, while convenient, frequently fall short on flavor and texture, leaving you with a less-than-satisfying snack.
This is precisely where the beauty of a homemade kettle corn recipe shines. Making it yourself means:
- Unmatched Freshness: Experience the snack at its peak, moments after popping.
- Quality Control: You choose the best oil, popcorn kernels, and the exact amount of sugar and salt for your preference.
- Speed and Simplicity: Believe it or not, this gourmet-tasting treat comes together in under five minutes with just four basic ingredients. For a detailed guide on quick preparation, check out our article: Easy Homemade Kettle Corn: 5 Minutes to Fair-Quality Taste.
- Cost-Effectiveness: A large batch of homemade kettle corn is significantly cheaper than buying individual bags.
- The Joy of Creation: There’s immense satisfaction in creating a beloved snack from scratch, filling your home with that incredible aroma.
The Simple Ingredients You'll Need
Creating this delectable treat requires surprisingly few components, all of which are likely already in your kitchen pantry. The magic lies not in exotic ingredients, but in the proper technique for combining these four fundamental items:
- Popping Corn: This is, naturally, the star of the show. While standard butterfly popcorn works, for truly superior results, seek out mushroom popcorn kernels. As the name suggests, these kernels pop into dense, round, mushroom-shaped balls, offering a larger, more uniform surface area that holds the sugar coating beautifully. They also tend to have fewer pesky hulls, making for a more enjoyable eating experience. If you plan to make kettle corn regularly, investing in mushroom kernels is a worthy endeavor.
- Oil: A good neutral oil with a high smoke point is crucial. Coconut oil is a classic choice for popcorn due to its subtle flavor and performance, but vegetable oil, canola oil, or grapeseed oil also work exceptionally well. Avoid olive oil or butter, as their lower smoke points can lead to burning.
- Granulated Sugar: This provides the sweetness and forms that signature delicate crust.
- Fine Salt: Essential for balancing the sweetness and enhancing all the flavors. Fine-grained salt adheres better to the kernels and distributes more evenly than coarse salt.
Mastering the Kettle Corn Technique: Key Tips for Crunchy Sweetness
While the ingredients are simple, the true artistry of a perfect kettle corn recipe lies in the execution. Following these expert tips will ensure every batch is crispy, sweet, and perfectly popped, banishing burnt kernels and soggy results.
Choosing the Right Pot
A heavy-bottomed pot, such as a 6-quart Dutch oven or a sturdy stockpot with a tight-fitting lid, is ideal. The heavy bottom helps distribute heat evenly, preventing hot spots that can burn sugar or kernels. Ensure your pot is large enough to allow the corn room to expand, typically 6-8 quarts for a half-cup of kernels.
The Tester Kernel Trick
This seemingly small step is a game-changer. Add just 2-3 popcorn kernels and a tablespoon of oil to your pot over medium-high heat. Cover and wait for them to pop. The moment they pop, you know your oil has reached the optimal temperature. Remove these tester kernels, then immediately add the rest of your popcorn, sugar, and salt. This prevents kernels from sitting in oil that's too cool (leading to unpopped kernels) or too hot (leading to burning before popping).
The Critical Role of Continuous Shaking
Once you've added the remaining ingredients, cover the pot and begin to shake it continuously back and forth over the burner. This isn't just for fun; it's vital for several reasons:
- Even Heating: Prevents kernels from resting directly on the hot bottom of the pot and burning.
- Even Sugar Distribution: Ensures the sugar melts and coats *all* the kernels evenly as they pop, rather than scorching on the bottom.
- Prevents Sticking: Keeps the sugary kernels from clumping together or sticking to the pot.
Keep shaking until the popping slows significantly, usually to about 2-3 seconds between pops.
The Lid: Ajar for Optimal Crunch
Here’s another crucial technique that sets perfect kettle corn apart: once the popping starts in earnest, leave the lid slightly ajar. This allows steam to escape from the pot. Steam is the enemy of crispiness! By letting it vent, you ensure your kettle corn emerges wonderfully crunchy, not soft or soggy. For more detailed advice on achieving the ultimate crisp, read our guide:
Say Goodbye to Soggy Popcorn: Master Homemade Kettle Corn.
Timing is Everything: Adding Sugar and Salt
Many beginner kettle corn makers wonder about when to add the sugar. The trick is to add the granulated sugar and salt *at the same time* as the unpopped kernels to the heated oil (after removing the tester kernels). The continuous shaking throughout the popping process prevents the sugar from burning on the bottom of the pot. As the kernels pop, the sugar melts and adheres to their hot surfaces, creating that perfect crispy coating.
Off the Heat and Cool Immediately
Once the popping slows to just an occasional pop, immediately remove the pot from the heat. Carefully uncover it (watch out for any final rogue pops!) and quickly transfer the kettle corn onto a large baking sheet lined with parchment paper or foil, spreading it out in a single layer. This immediate transfer and cooling step is essential to prevent the kettle corn from steaming itself in the pot, which would lead to sogginess, and to help the sugar coating crisp up beautifully. Let it cool for a few minutes before diving in.
Common Kettle Corn Pitfalls and How to Avoid Them
Even with the best intentions, things can sometimes go awry. Here are a few common issues and how to troubleshoot them:
- Burnt Sugar/Kernels: This usually happens if the heat is too high, you're not shaking continuously enough, or you're using too large a batch for your pot. Remember to use medium-high heat and keep that pot moving!
- Soggy Popcorn: This is almost always due to trapped steam. Ensure your lid is slightly ajar during popping and transfer the corn immediately to a baking sheet to cool once done.
- Unevenly Coated Kernels: Again, continuous shaking is key. If the sugar isn't distributed as the kernels pop, some will be plain while others are overloaded.
- Too Many Unpopped Kernels: This often means your oil wasn't hot enough when you added the main batch (the tester kernel trick prevents this!) or the heat was too low throughout.
With these expert tips and a little practice, your homemade kettle corn recipe will quickly become a cherished favorite. The joy of creating this crunchy, sweet, and salty snack from scratch is truly rewarding, and the taste is undeniably superior to anything you can buy. So, grab your pot, your kernels, and get ready to bring the magic of the fair right into your home, one perfect batch at a time!