Say Goodbye to Soggy Popcorn: Master Homemade Kettle Corn
There's an undeniable magic to the aroma of freshly popped kettle corn drifting through a bustling county fair or a lively carnival. That distinctive scent, a tantalizing blend of sweet and salty, often acts like a homing beacon, drawing you in until you hear the cheerful popping chorus and find yourself holding a warm, generous bag of that irresistible snack. The act of messily munching on handfuls of perfectly balanced, crispy kettle corn is, for many, a peak snacking experience. But let's be honest, state fairs and carnivals are annual luxuries, not everyday occurrences. What if you crave that same fresh, crunchy, sweet-and-salty delight more often? The good news is, you absolutely can, with a fantastic **kettle corn recipe** that brings the fairground flavor right into your kitchen.
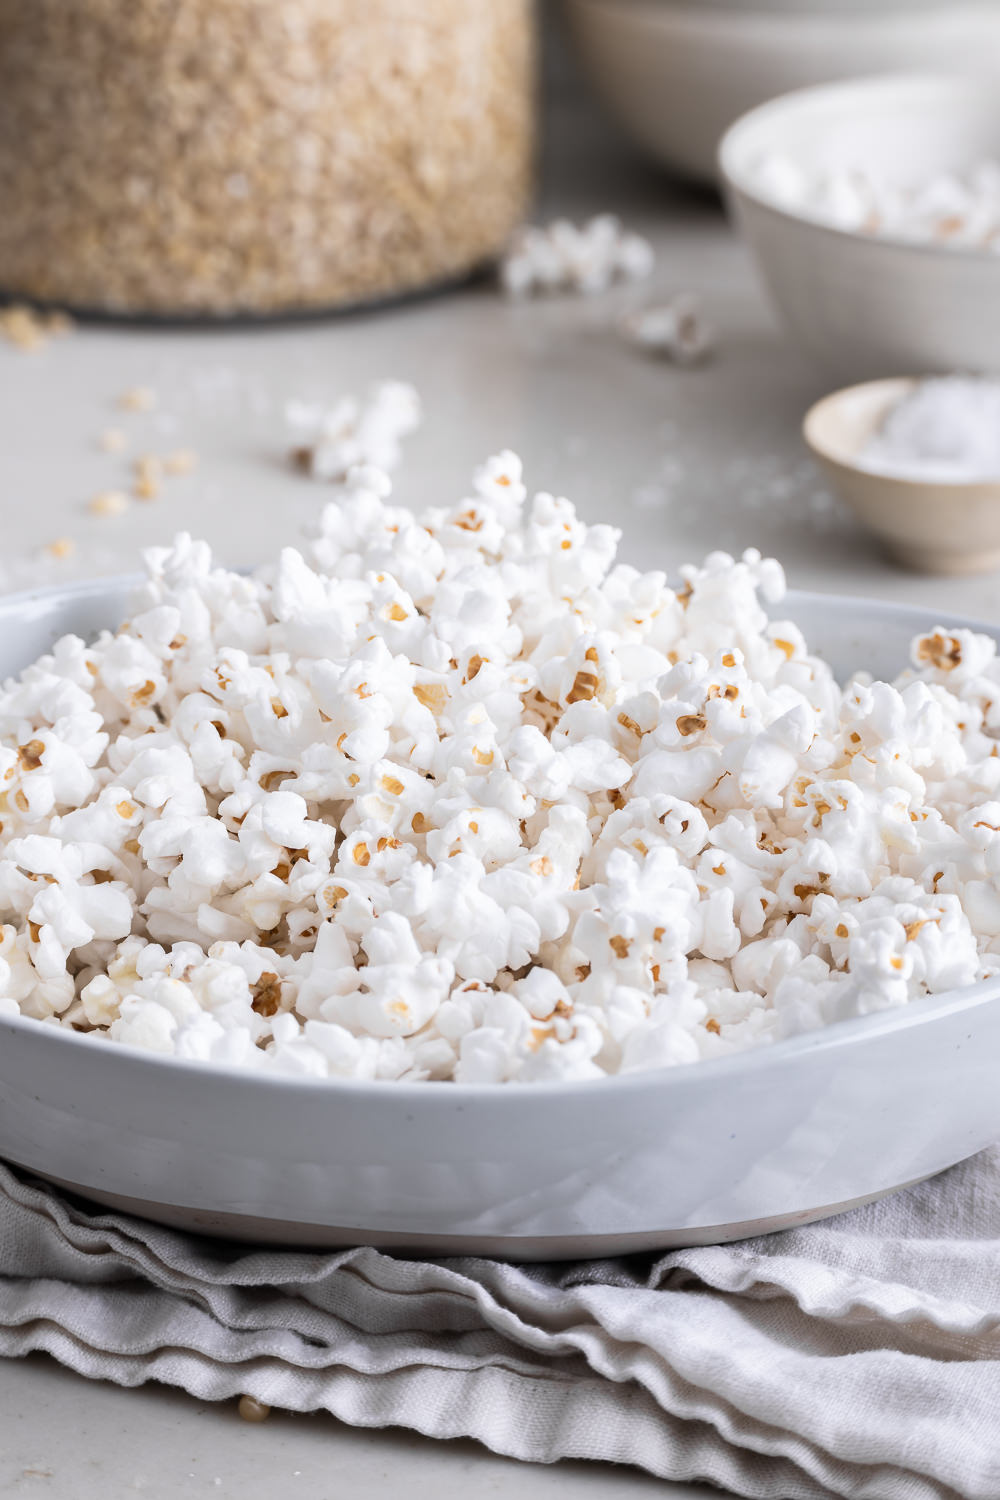
What Exactly Is Kettle Corn? A S&S Symphony
In the grand pantheon of popcorn varieties, kettle corn holds a uniquely cherished spot. It’s neither the plain, buttery movie theater staple nor the deeply caramelized, chewy indulgence of caramel corn. Instead, kettle corn offers a sophisticated equilibrium, a harmonious blend of salty and sweet that captivates the taste buds. Each fluffy, popped kernel is encased in a delicate, lightly golden, crisp sugary coating – substantial enough to provide that satisfying crunch and flavor, yet light enough to avoid sticking to your teeth like its caramel cousin. It's a snack that provides both comfort and excitement, a simple pleasure perfected by a few key steps. Achieving this elusive balance and ideal texture might seem like a culinary secret, but with the right **kettle corn recipe**, it's surprisingly simple to master at home.
The Magic Behind the Mix: Why Homemade Kettle Corn Reigns Supreme
While the allure of store-bought or microwave kettle corn might seem convenient, they often fall short of the true fairground experience. Pre-popped bags from the grocery store frequently suffer from staleness, losing their crispness and vibrant flavor by the time they reach your pantry. Microwave versions, while quick, often deliver a lackluster, artificial taste that pales in comparison to the real deal. This is precisely where a homemade **kettle corn recipe** shines.
Imagine a snack that tastes as if it just emerged from a giant, bubbling kettle at the fair, but was actually made in your own kitchen in mere minutes. The beauty of crafting kettle corn at home lies in its astonishing simplicity and unparalleled freshness. You only need four basic ingredients – popping corn, sugar, salt, and oil – and one pot. From start to finish, the entire process takes less than five minutes of active cooking, transforming humble kernels into a gourmet treat. The payoff is immense: a warm, fragrant, perfectly crunchy, and flawlessly balanced snack that far surpasses any pre-packaged alternative. It’s a testament to how effortlessly you can elevate your snacking game, transforming a simple activity into a delightful culinary adventure. For more quick tips on achieving this, check out our guide on
Easy Homemade Kettle Corn: 5 Minutes to Fair-Quality Taste.
Unlocking the Perfect Kettle Corn Recipe: Essential Tips for Success
Crafting the perfect batch of homemade kettle corn isn't just about mixing ingredients; it's about understanding the subtle science behind the sizzle. Here are the crucial tips to ensure every kernel is a perfectly popped, salty-sweet masterpiece, preventing a burnt mess and guaranteeing maximum crunch.
Choosing Your Ingredients Wisely
- Popcorn Variety Matters: While any popping corn will technically work, for truly superior kettle corn, seek out mushroom popcorn. As its name suggests, mushroom popcorn pops into a round, dense, and large ball, much like a mushroom cap. This robust shape makes it less prone to crushing, resulting in a sturdier, satisfying crunch, and often fewer bothersome hulls compared to the more delicate "butterfly" variety. If you plan to make popcorn regularly, investing in mushroom kernels is a game-changer.
- The Right Oil: Opt for an oil with a high smoke point and a neutral flavor, such as canola oil, vegetable oil, grapeseed oil, or coconut oil. These oils can withstand the heat required for popping without burning or imparting unwanted flavors.
- Sugar and Salt: Fine-grain sugar (like granulated white sugar) melts and coats more evenly. Fine salt also distributes better, ensuring that signature salty kick. The ratio is crucial for that perfect sweet-salty balance, so stick close to your chosen **kettle corn recipe**'s recommendations.
Mastering the Popping Process
- Temperature Control with Tester Kernels: This step is non-negotiable for foolproof popping. Begin by adding your chosen oil to the pot, then toss in just 2-3 popcorn kernels. Cover the pot and place it over medium-high heat. Wait patiently for these "tester" kernels to pop. This ensures the oil reaches the ideal temperature – hot enough to pop efficiently but not so hot that it burns the sugar prematurely. If the oil is too cold, your popcorn will pop slowly and become tough; too hot, and it will burn before all kernels have a chance to burst.
- The Steam Escape Secret: Once your main batch of popcorn, sugar, and salt are in the hot oil, replace the lid, but leave it slightly ajar – just enough for a small gap. This crucial detail allows steam to escape from the pot. Steam is the enemy of crispiness; trapping it inside will lead to soggy, chewy popcorn. By letting it vent, you ensure crunchy, perfectly textured kernels every time.
- Continuous Motion for Even Coating: Once the popping starts in earnest, you must continuously shake the pot. Grab the pot handles firmly and gently but constantly move the pot back and forth over the burner. This guarantees that the sugar melts evenly and coats every kernel, preventing burning on the bottom and ensuring consistent flavor and texture throughout the batch. Keep shaking until the popping slows significantly, almost to a halt (about 2-3 seconds between pops).
- Batch Size Matters: While fairgrounds use colossal kettles, home versions benefit from smaller batches. Overcrowding the pot prevents the kernels and sugar from moving freely, leading to uneven cooking and more burnt pieces. A 6-quart pot is usually ideal for about ½ cup of unpopped kernels.
Post-Pop Perfection
- Cooling is Key: As soon as the popping subsides, immediately transfer the kettle corn to a large baking sheet lined with parchment paper. Spread it out in a single layer to cool. This rapid cooling prevents residual heat from making the popcorn soft and allows the sugary coating to set and crisp up beautifully.
- Storage for Sustained Crunch: Once completely cool, store any leftover kettle corn in an airtight container at room temperature. This will help maintain its crunch for a few days, though it’s always best enjoyed fresh!
By following these detailed steps, you’ll not only achieve a perfectly crunchy, salty-sweet snack but also gain confidence in your popping prowess. For more in-depth techniques, consult
Perfect Kettle Corn Every Time: Key Tips for Crunchy Sweetness.
Your Go-To Kettle Corn Recipe: Simplified Steps
Ready to make your own batch of irresistible, fair-quality kettle corn? Here’s a streamlined approach based on the best practices:
- Prep Your Pot: Gather a heavy-bottomed 6-quart pot with a lid. Have your popping corn (preferably mushroom variety), granulated sugar, salt, and high-smoke-point oil (like canola or vegetable) ready.
- Oil and Tester Kernels: Pour about 2 tablespoons of oil into the pot. Add 2-3 unpopped popcorn kernels. Cover the pot and place it over medium-high heat.
- Listen for the Pop: Wait until the tester kernels pop. This indicates your oil is at the perfect temperature.
- Add Main Ingredients: Remove the pot from the heat momentarily. Carefully remove the popped tester kernels. Add ½ cup of popping corn, ¼ cup of granulated sugar, and ½ teaspoon of fine salt to the hot oil. Stir quickly to coat the kernels.
- Cover and Shake: Replace the lid, leaving it slightly ajar (a small gap). Return the pot to medium-high heat. Immediately begin to shake the pot continuously and vigorously back and forth across the burner.
- Pop, Pop, Pop: Keep shaking! You'll hear the kernels begin to pop. Continue shaking until the popping slows to 2-3 seconds between pops (this usually takes 3-5 minutes total).
- Transfer and Cool: Immediately remove the pot from the heat and carefully pour the freshly popped kettle corn onto a large baking sheet lined with parchment paper. Spread it into a single layer and allow it to cool completely before serving. This ensures maximum crispiness.
That’s it! In just about five minutes, you'll have a generous batch of warm, fragrant, perfectly balanced kettle corn ready to enjoy.
Conclusion
Saying goodbye to soggy, stale, or flavorless popcorn is easier than you think. With a simple yet effective **kettle corn recipe**, you can recreate the beloved fairground snack in your own kitchen, any time the craving strikes. By understanding the importance of mushroom kernels, precise temperature control, steam escape, and continuous shaking, you’re not just popping corn – you’re mastering an art form. So, next time that sweet-salty craving hits, skip the store-bought versions and whip up a batch of homemade kettle corn. Your taste buds (and your family) will thank you for the fresh, crunchy, perfectly balanced delight that awaits. Enjoy the ultimate snacking experience, right at home!